
Night photography and capturing star trails can be a captivating and challenging endeavor for photographers seeking to capture the beauty of the night sky. With advancements in camera technology, it has become easier than ever to delve into this niche genre of photography. However, one crucial aspect that often poses difficulties is achieving precise focus in low light conditions. This article aims to explore various focusing techniques specifically tailored for night photography and star trail images.
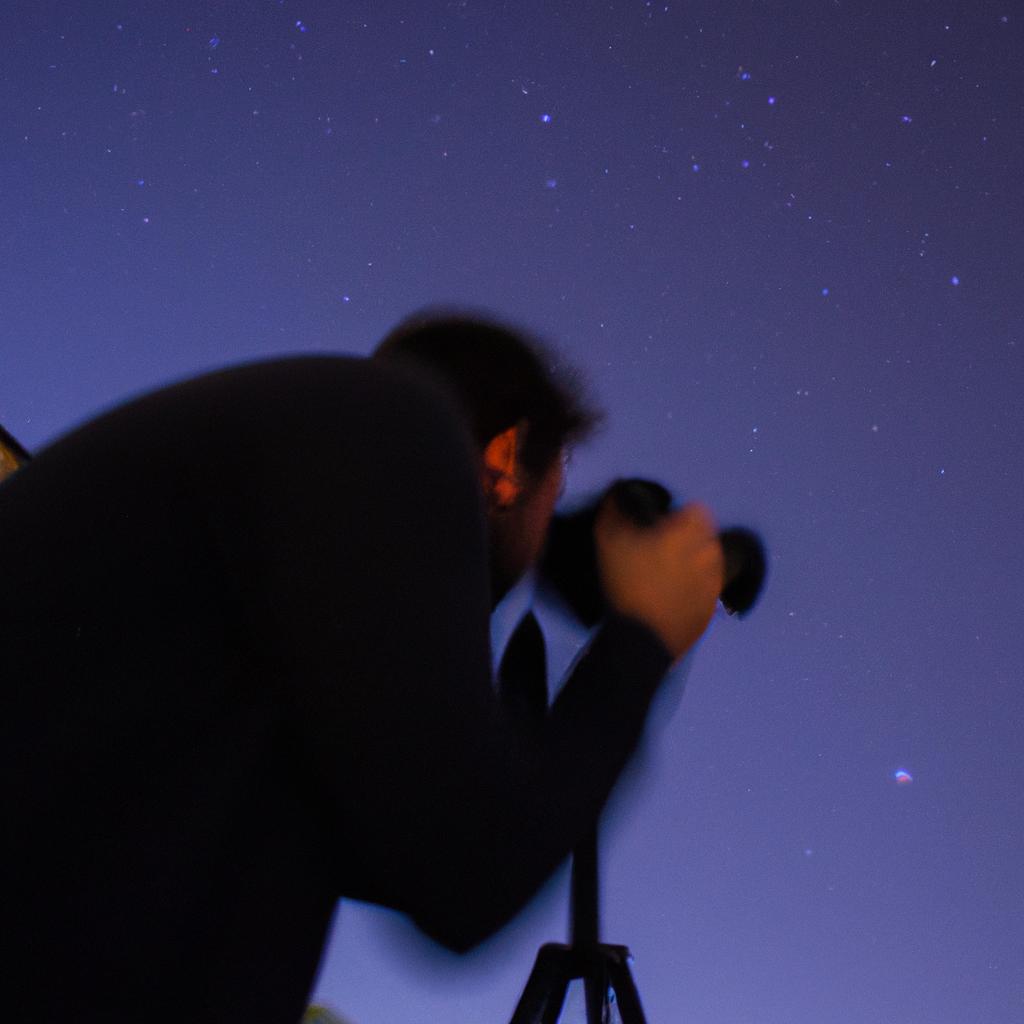
In order to illustrate the importance of proper focusing techniques, let us consider an example scenario. Imagine a photographer venturing out on a clear night with the intention of photographing star trails over a serene lake. Armed with their trusty DSLR camera mounted on a sturdy tripod, they carefully compose the shot, adjusting exposure settings accordingly. As darkness enfolds around them, they attempt to autofocus using conventional methods but are met with frustration as their camera struggles to lock onto any reference point in the pitch-black environment. In moments like these, having knowledge of effective focusing techniques becomes essential in overcoming such challenges and ensuring optimal image quality.
By employing specific strategies such as manual focus adjustment, hyperfocal distance calculation, or utilizing live view mode for fine-tuning focus, photographers can enhance their chances of obtaining sharp details in their nighttime photographs. This article will provide step-by-step instructions and explanations for each of these focusing techniques, helping photographers navigate the intricacies of night photography and capture stunning star trail images with precision and clarity.
Firstly, the article will delve into manual focus adjustment. This technique involves turning off the autofocus function on the camera lens and manually adjusting the focus ring to achieve sharpness. The article will explain how to locate a bright reference point in the night sky, such as a distant star or planet, and use it as a guide for achieving accurate focus. It will also discuss the importance of using magnification features on the camera’s LCD screen or viewfinder to aid in precise manual focus adjustments.
Next, the article will explore hyperfocal distance calculation as an alternative focusing method for night photography. Hyperfocal distance refers to the nearest distance at which objects appear acceptably sharp when focused at infinity. By understanding and utilizing hyperfocal distance, photographers can maximize depth of field in their images, ensuring both foreground elements and distant stars are in focus. The article will provide formulas and guidelines for calculating hyperfocal distance based on aperture settings and lens focal length.
Lastly, the article will highlight live view mode as a valuable tool for fine-tuning focus during night photography sessions. Live view mode allows photographers to preview their composition on the camera’s LCD screen in real-time, enabling them to zoom in on specific areas of interest and adjust focus accordingly. The article will discuss how to activate live view mode and utilize features like focus peaking or digital zoom to achieve optimal sharpness in low light conditions.
Throughout the article, practical tips and considerations specific to night photography will be provided, such as using manual exposure settings, minimizing camera shake with remote shutter releases or self-timers, and avoiding overexposure from nearby city lights or other artificial sources.
By following these detailed instructions and incorporating these focusing techniques into their workflow, photographers can overcome the challenges posed by low light conditions and achieve breathtaking star trail images with precise focus and stunning detail.
Understanding long exposures
Capturing stunning night photography and mesmerizing star trails requires a solid grasp of the concept of long exposures. By extending the duration of your camera’s shutter speed, you can capture more light over time, resulting in brighter and clearer nighttime images. To illustrate this point, let us consider an example: imagine photographing the Milky Way on a clear summer night. With a short exposure time, only a few stars will be visible in your image. However, by employing long exposures, you can reveal countless stars that were previously invisible to the naked eye.
To fully comprehend the significance of long exposures in night photography, it is crucial to understand their impact on different aspects of your images:
- Light sensitivity: Longer exposures allow for greater light absorption by your camera sensor, enhancing visibility even in low-light conditions.
- Motion blur: Moving objects or subjects captured during long exposures may appear blurred due to their continuous motion throughout the exposure.
- Noise reduction: Lengthening the exposure time can reduce noise levels caused by high ISO settings, resulting in cleaner and sharper images.
- Star trail formation: One remarkable effect achievable through extended exposures is capturing star trails – beautiful arcs created as distant celestial bodies move across the sky during your shot.
By considering these factors and incorporating them into your compositions consciously, you can achieve breathtaking results when engaging with long exposure techniques.
Transitioning seamlessly from understanding long exposures to selecting appropriate equipment for night photography, we now delve into exploring how choosing the right lens greatly impacts capturing awe-inspiring nocturnal scenes.
Choosing the right lens for night photography
Imagine capturing a breathtaking image of star trails shimmering across the night sky, leaving viewers in awe of the beauty and wonder of the universe. To achieve such stunning photographs, understanding long exposures is essential. A long exposure refers to an extended shutter speed that allows more light to enter the camera sensor over an extended period. This technique enables photographers to capture details not visible to the naked eye under normal circumstances.
One real-life example illustrating the importance of long exposures in night photography involves photographing a cityscape at dusk. By utilizing a longer exposure time, around 30 seconds or more, the photographer can capture vibrant streaks of light from passing cars and illuminated buildings against a darkening sky. The resulting image showcases the dynamic energy and ambiance unique to urban environments during twilight hours.
To further emphasize why long exposures are crucial for nighttime shots, consider these key points:
- Enhanced Light Capture: Longer exposure times enable cameras to accumulate more available light, leading to brighter images with better visibility.
- Motion Blur Effects: With longer exposures, moving subjects appear as blurred streaks or trails, adding a sense of motion and dynamism to photographs.
- Star Trail Formation: Long exposures allow stars’ apparent movement due to Earth’s rotation to create mesmerizing circular patterns known as star trails.
- Increased Depth of Field: Lengthy exposures result in greater depth of field by blending foreground elements with distant objects into one cohesive composition.
| Exposure Time | Effect |
|---|---|
| 5-15 seconds | Softens waterfalls |
| 15-30 seconds | Blurs clouds |
| Over 1 minute | Creates star trail effect |
In summary, comprehending the impact of long exposures on night photography opens up new creative possibilities for capturing captivating images after dark. Through extended shutter speeds, photographers can explore different effects such as motion blur and star trail formation, resulting in visually striking compositions.
Transitioning seamlessly into the subsequent section on “Choosing the Right Lens for Night Photography,” we embark upon an exploration of manual focus techniques that can elevate your nocturnal captures to new heights.
Utilizing manual focus techniques
After understanding the importance of choosing the right lens for night photography, let us now delve into the essential techniques of manual focus that can greatly enhance your nighttime shots.
Manual focusing is a crucial skill to master when shooting in low light conditions. By taking control of the focus yourself, you ensure that the camera accurately captures the desired subject without any misinterpretation. One example scenario could be photographing a starry night sky with an interesting foreground element such as a mountain range or a lone tree. To achieve sharpness throughout the frame, it is necessary to use specific manual focusing techniques.
To effectively utilize manual focus in night photography, consider employing these helpful strategies:
- Using live view: Engaging the live view mode on your camera’s LCD screen allows for precise focusing by magnifying the image. This enables you to identify small details and adjust the focus accordingly.
- Utilizing depth of field: Understanding how depth of field works empowers you to make informed decisions about what should be in focus and what should have a softer appearance. Experimenting with different aperture settings will help you achieve your desired creative effect.
- Employing hyperfocal distance: Hyperfocal distance refers to the point at which everything from half that distance to infinity appears acceptably sharp. Calculating this distance based on your chosen focal length and aperture setting ensures maximum sharpness throughout your scene.
- Using focus peaking: Some cameras offer a feature called “focus peaking” which highlights areas that are in focus using colored lines or dots superimposed on your composition. Leveraging this tool simplifies achieving accurate manual focus.
To further illustrate these strategies, here is a table showcasing their benefits and potential outcomes:
| Technique | Benefit | Outcome |
|---|---|---|
| Using live view | Allows precise focusing through magnification | Enhanced clarity |
| Utilizing depth of field | Enables creative control over focus | Selective sharpness |
| Employing hyperfocal distance | Maximizes overall scene sharpness | Clear details throughout the frame |
| Using focus peaking | Simplifies achieving accurate manual focus | Precise and crisp subject representation |
Mastering these techniques will significantly enhance your ability to capture breathtaking night photographs. By taking full control of the focusing process, you can ensure that every element in your composition is captured with utmost clarity.
Now that we have explored the art of manual focus for night photography, let us move on to another essential technique known as light painting.
Mastering light painting
Building on the knowledge of utilizing manual focus techniques, we can now delve into another essential aspect of night photography and star trails – mastering light painting. By understanding how to effectively paint with light during long exposures, photographers can add captivating visual elements to their images and create stunning compositions.
Light painting is a technique where photographers use various light sources to illuminate specific areas or objects within a scene during a long exposure. This method allows for creative control over lighting in low-light situations, enhancing the overall composition and making it visually appealing. For instance, imagine capturing an abandoned building at night using light painting techniques; by selectively illuminating different sections of the structure, you can highlight its architectural details while creating a sense of mystery and intrigue.
To achieve successful light paintings in your night photography endeavors, consider the following:
- Experiment with Different Light Sources: Explore using flashlights, LED lights, glow sticks, or even smartphones as tools for painting with light. Each source offers unique characteristics such as color temperature and intensity that can dramatically impact your final image.
- Understanding Exposure Settings: Adjusting your camera settings plays a crucial role in achieving desirable outcomes when working with long exposures. Factors like aperture size, shutter speed, and ISO sensitivity affect both the ambient lighting and the painted subject.
- Practicing Techniques: Like any skill, practicing light painting techniques will help refine your abilities. Experimentation with movement patterns, angles of illumination, and distances from the subject will allow you to develop your own style.
The benefits of mastering light painting are numerous:
- It adds depth and dimension to photographs taken in low-light conditions.
- It enables photographers to emphasize particular subjects or elements within a frame.
- It provides endless opportunities for creativity and experimentation.
- It enhances storytelling capabilities by evoking emotions through carefully illuminated scenes.
Incorporated table showcasing examples (markdown format):
| Light Painting Techniques | Effects |
|---|---|
| Orb | Creates a mesmerizing, floating light sphere effect. |
| Streaks | Adds dynamic and energetic lines to the composition. |
| Spotlights | Directs attention towards specific subjects or areas of interest. |
| Patterns | Enables the creation of intricate designs within the frame. |
As we continue our exploration into night photography, the next section will focus on exploring creative composition in low light, where we will discover techniques for capturing visually engaging images that truly captivate viewers’ attention without relying solely on light painting.
Remember, there are various ways to create captivating compositions even in challenging lighting conditions.
Exploring creative composition in low light
Having mastered light painting techniques, let us now delve into the realm of creative composition in low light photography. By understanding how to effectively compose your shots in challenging lighting conditions, you can elevate your night photography and star trails to new heights.
To illustrate the importance of composition in low light photography, consider the following scenario: imagine capturing a breathtaking landscape under a starry sky. The positioning of elements within your frame becomes crucial for creating a visually compelling image. Here’s an example – by placing a prominent landmark or tree off-center and aligning it with one of the celestial bodies, such as Polaris, you can create a sense of depth and guide the viewer’s gaze towards both earthly and heavenly wonders.
When composing photographs in low light conditions, keep these key principles in mind:
- Leading Lines: Utilize natural or man-made lines that lead the viewer’s eye through the frame towards interesting subjects or vanishing points.
- Rule of Thirds: Divide your frame into three equal vertical and horizontal sections using imaginary gridlines. Positioning focal points along these intersections often results in more balanced and visually pleasing compositions.
- Framing: Incorporate foreground elements like archways, branches, or windows to frame your subject matter, adding depth and context to your images.
- Negative Space: Embrace empty areas surrounding focal points to highlight their significance and evoke feelings of tranquility, isolation, or vastness.
| Principle | Description |
|---|---|
| Leading Lines | Use lines within your composition to lead the viewer’s eye throughout the image. |
| Rule of Thirds | Divide your frame into thirds horizontally and vertically; position key elements at intersecting points. |
| Framing | Employ objects or structures around your subject matter to enhance its visual impact. |
| Negative Space | Allow empty space around subjects to emphasize their importance and evoke certain emotions. |
By thoughtfully applying these composition techniques, you can create visually captivating night photographs and star trails that resonate with your audience. The artistry of composing images in challenging lighting conditions adds depth and intrigue to your work, allowing viewers to immerse themselves in the ethereal beauty of nocturnal scenes.
Now that we have explored creative composition in low light photography, let us venture into the realm of post-processing tips for enhancing night images.
Post-processing tips for enhancing night images
Exploring creative composition in low light can yield stunning results in night photography. By utilizing various techniques and understanding the principles of composition, photographers can capture captivating images that showcase their unique perspective. One example is a photograph taken at a remote beach during a new moon. The absence of ambient light allowed for an unobstructed view of the stars above, creating a mesmerizing backdrop for the subject.
To effectively compose a night photograph, it is essential to consider several factors:
- Leading lines: Utilize strong leading lines such as roads or fences to guide the viewer’s eye towards the main subject.
- Rule of thirds: Divide the frame into nine equal parts using two horizontal and two vertical lines. Positioning key elements along these lines or at their intersections creates balance and visual interest.
- Framing: Incorporate natural frames like archways or trees to add depth and draw attention to the subject.
- Negative space: Leave empty areas in your composition to emphasize the main subject and create a sense of tranquility.
In addition to these compositional techniques, experimenting with different camera settings can enhance creativity in low-light situations. Here are some recommended configurations:
| Setting | Description |
|---|---|
| Aperture | Use a wide aperture (low f-number) to maximize light intake and achieve shallow depth of field effects. |
| Shutter Speed | Opt for longer exposures (several seconds or more) to capture star trails or create motion blur effects. |
| ISO | Increase sensitivity by selecting higher ISO values; however, be cautious as this may introduce noise into the image. |
By employing these techniques and settings creatively, photographers have vast opportunities to explore innovative compositions and produce breathtaking night photographs that leave viewers captivated.
Overall, embracing creative composition in low light photography opens up endless possibilities for capturing unique moments under the starry sky. Through strategic utilization of leading lines, rule of thirds, framing, and negative space alongside careful camera settings, photographers can express their artistic vision and evoke a sense of wonder in their audience.
Comments are closed.