
The night sky has always held a fascinating allure for humanity, captivating our imaginations and inspiring countless works of art. One mesmerizing phenomenon that can be observed in the night sky is star trails – streaks of light created by the movement of stars over long exposure photographs. To truly capture the ethereal beauty of star trails requires careful planning, technical expertise, and an understanding of the celestial mechanics at play.
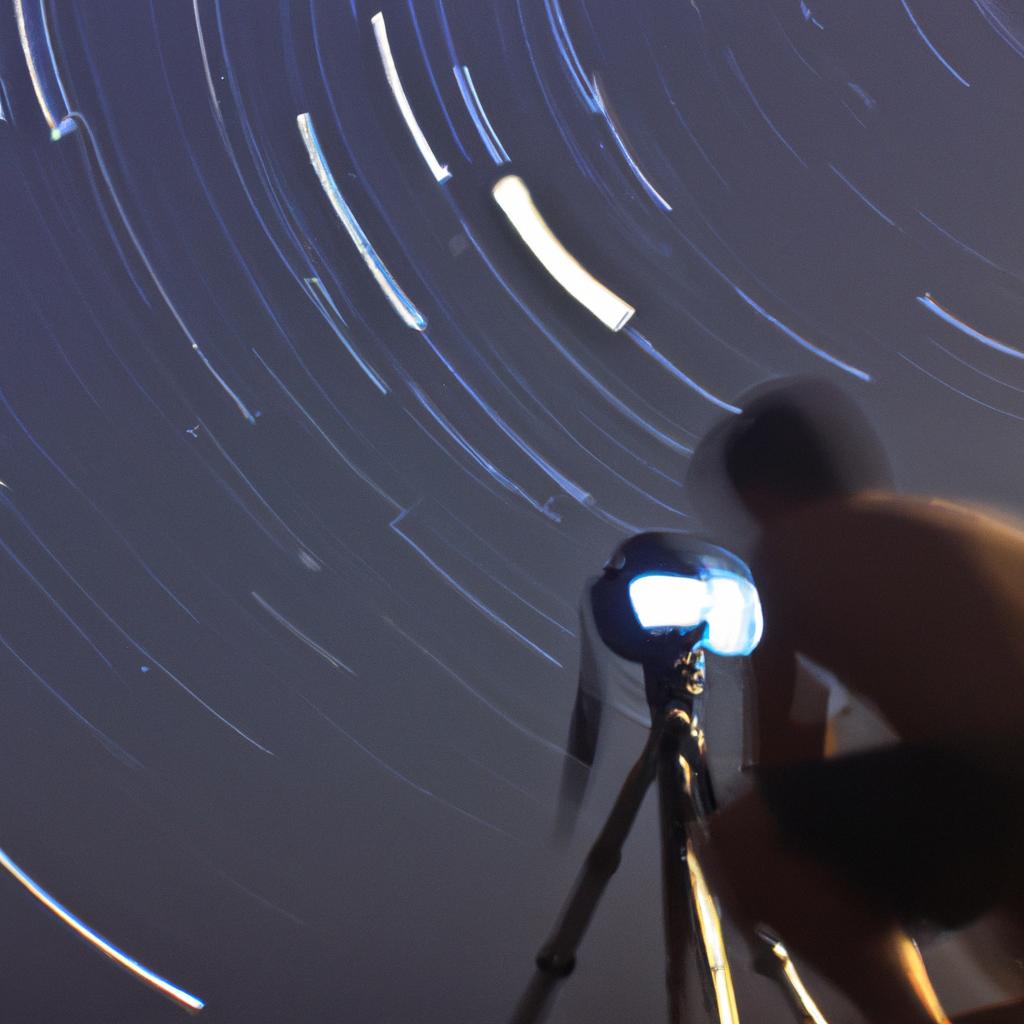
Consider this hypothetical scenario: A photographer sets out on a clear, moonless night to capture the breathtaking display of star trails above a serene mountain landscape. Armed with their camera mounted on a sturdy tripod, they carefully select their composition and adjust their settings accordingly. As they press the shutter button, time seems to stand still as their camera begins its long exposure journey into capturing the passage of time among the stars.
Understanding how star trails are formed is essential for successfully capturing this awe-inspiring phenomenon. The Earth’s rotation causes stars to appear as if they are moving across the night sky. In reality, it is our planet’s rotation that creates this illusion. By keeping their camera’s shutter open for an extended period, typically several minutes or even hours, photographers can capture multiple instances of these stellar movements onto a single frame, resulting in stunning images where individual stars appear as streaks of light.
To achieve the best results, there are several key factors for the photographer to consider. Firstly, finding a location away from light pollution is crucial for capturing clear and vibrant star trails. Urban areas tend to have high levels of artificial light that can wash out the stars and diminish the overall impact of the image.
Secondly, it’s important to choose an interesting foreground or subject to complement the star trails. This could be a mountain range, a lake, or any other captivating element that adds depth and context to the composition.
Next, the photographer will need to set up their camera on a sturdy tripod to ensure stability throughout the long exposure. They may also want to use a remote shutter release or timer function to minimize any movement caused by pressing the shutter button.
In terms of camera settings, shooting in manual mode allows for greater control over exposure and other parameters. The photographer would typically select a low ISO setting (such as ISO 100) to reduce noise in the final image. They would also choose a wide aperture (e.g., f/2.8) to allow more light into the camera sensor. Finally, they would set a slow shutter speed (several minutes or more) depending on factors like ambient light conditions and desired length of star trails.
Patience is key during this process as capturing star trails often involves waiting for several exposures to accumulate on the camera’s memory card. In post-processing, these individual frames can be stacked together using specialized software to create one seamless image with beautiful star trails.
Overall, photographing star trails requires careful planning, technical knowledge, and an appreciation for both astronomy and artistic composition. With practice and experimentation, photographers can capture stunning images that showcase the mesmerizing beauty of our night sky.
Choosing the right camera settings
Imagine standing under a blanket of stars on a clear night, camera in hand, ready to capture the mesmerizing phenomenon known as star trails. The key to successfully capturing this breathtaking display lies in Choosing the right camera settings. In this section, we will explore essential considerations and techniques for achieving optimal results.
To begin with, understanding the impact of aperture is crucial when photographing star trails. By adjusting your lens’s aperture setting, you control the amount of light entering the camera. A wider aperture allows more light to reach the sensor, resulting in brighter images but potentially sacrificing some sharpness. Conversely, a narrower aperture decreases the amount of light captured while enhancing overall image quality. It is important to strike a balance between these two factors based on your desired outcome.
Another vital setting to consider is ISO sensitivity. Increasing ISO amplifies the camera’s sensor sensitivity to light, allowing for faster exposures during low-light conditions. However, higher ISO values may introduce unwanted noise or graininess into your photographs. Select an appropriate ISO level that maintains image quality without compromising detail.
Next, let us delve into shutter speed—the duration for which your camera’s shutter remains open during each exposure. Longer exposures create longer star trails but can also lead to motion blur if not carefully managed. As a general rule of thumb, start with shorter shutter speeds (around 15-30 seconds) and adjust accordingly based on lighting conditions and desired trail length.
Now that we have discussed these important aspects of camera settings for capturing star trails, here are some practical tips:
- Use manual mode: To have full control over all settings.
- Shoot in RAW format: This provides greater flexibility in post-processing.
- Experiment with different white balance settings: Choose one that suits your creative vision.
- Consider using a remote release or self-timer function: Minimizes vibration caused by pressing the shutter button manually.
| Camera Setting | Effect |
|---|---|
| Wide aperture | Brighter images, potential loss of sharpness |
| Narrow aperture | Dimmer images, improved overall quality |
| Increased ISO sensitivity | Faster exposures, possible noise or graininess |
| Longer shutter speed | Longer star trails, risk of motion blur |
Understanding the impact of exposure time is crucial when capturing star trails. By prolonging the duration of each exposure, you can create more pronounced and captivating trails in your photographs.
In the subsequent section, we will delve deeper into this aspect to further enhance your ability to capture awe-inspiring star trail imagery.
Understanding the impact of exposure time
Transitioning smoothly from the previous section on choosing the right camera settings, let’s now delve into understanding the impact of exposure time when capturing mesmerizing star trails in your night photography. To illustrate this concept, consider a hypothetical scenario where you are photographing a stunning landscape under a clear night sky filled with twinkling stars.
Exposure time plays a crucial role in capturing star trails effectively. Longer exposure times allow more light to reach the camera sensor, resulting in brighter and more pronounced star trails. For instance, if you were to set your exposure time for 30 seconds during this particular shoot, it would capture shorter star trails compared to an exposure time of several minutes.
To further comprehend the significance of exposure time, here is a bullet point list highlighting its impact:
- Longer exposure times create longer star trails.
- Shorter exposure times result in shorter or even no visible star trails.
- Experimentation with different exposure times allows you to achieve varying effects and artistic interpretations.
- Balancing exposure time with other key factors such as lighting conditions and desired compositions will enhance overall image quality.
Now let’s explore these ideas through a table that visually represents how different exposure times affect the appearance of star trails:
| Exposure Time | Resulting Star Trail Appearance |
|---|---|
| 15 sec | Faint or short |
| 30 sec | Moderate |
| 2 min | Prominent |
| 10 min | Dramatic and long |
As evident from this table, adjusting the exposure time can dramatically transform your final image by either emphasizing or diminishing the presence of captivating star trails.
In conclusion, mastering the concept of exposure time enables photographers to manipulate their images creatively while capturing breathtaking star trail phenomena. Understanding how various exposures influence these celestial wonders empowers you to experiment and tailor your shots according to your artistic vision.
Adjusting ISO for optimal results
Section Transition:
Having explored the significant role that exposure time plays in capturing captivating star trail images, we now turn our attention to another crucial aspect – Adjusting ISO settings. By understanding how ISO affects your photographs, you can optimize your camera’s sensitivity to light and produce stunning results.
Adjusting ISO for Optimal Results:
To comprehend the importance of ISO adjustments, let us consider an example. Imagine you are photographing a clear night sky with minimal ambient light pollution. In this scenario, setting a high ISO value will allow your camera sensor to capture more light quickly, resulting in brighter stars and enhanced details within each frame. Conversely, employing a low ISO value might yield darker shots with less noise but may require longer exposure times.
When determining the ideal ISO setting for star trail photography, several factors come into play. Here are some key considerations:
- Ambient Light Conditions: Assess the surrounding environment before deciding on an appropriate ISO value. If there is ample natural or artificial lighting present, a lower ISO may suffice as it reduces the risk of overexposure.
- Desired Image Quality: Consider whether you prioritize minimal noise levels or sharper details in your final image. Higher ISO values tend to introduce more digital noise while also enhancing fine details.
- Equipment Capabilities: Familiarize yourself with your camera’s performance at different ISO ranges. Some cameras handle higher sensitivities better than others, ensuring cleaner images even at elevated settings.
- Post-processing Workflow: Evaluate how comfortable you are with post-processing techniques such as noise reduction software. If you have robust editing skills or access to advanced software tools, opting for higher ISOs during shooting becomes viable.
To summarize, adjusting your camera’s ISO allows you to balance various factors such as ambient light, image quality preferences, equipment capabilities, and post-processing workflow. By considering these elements carefully, you can determine the optimal ISO value to achieve mesmerizing star trail images.
As we delve deeper into refining our night photography skills, it becomes essential to explore noise reduction techniques that further enhance the visual impact of our star trail photographs.
Utilizing noise reduction techniques
Having adjusted the ISO settings, we can now explore effective techniques for reducing noise in our star trail photography. By employing these methods, photographers can enhance the clarity and overall quality of their images.
Section – Utilizing noise reduction techniques:
To demonstrate the impact of noise reduction techniques, let’s consider a hypothetical scenario where a photographer captures a stunning star trail image but is faced with significant digital noise. To address this issue, here are some key strategies they could employ:
-
Shooting at low temperatures: Cold environments tend to reduce sensor heat buildup during long exposures, resulting in lower levels of digital noise.
-
Dark frame subtraction: This technique involves capturing an additional exposure with the lens cap on immediately after taking the main shot. The dark frame contains only the camera’s internal noise and can be subtracted from the original image using post-processing software, effectively eliminating much of the visible noise.
-
Stacking multiple frames: By combining several shorter-exposure shots taken consecutively, rather than relying solely on one long exposure, photographers can minimize individual frame noise while still achieving a smooth and continuous star trail effect.
-
Applying selective denoising: Using specialized software or specific editing tools within post-processing applications, photographers can selectively target noisy areas without compromising detail in other parts of the image.
Consider incorporating these techniques into your workflow when processing your star trail photographs to achieve cleaner and more visually appealing results.
Incorporating bullet point list (markdown format):
Here are four reasons why utilizing proper noise reduction techniques is crucial for high-quality star trail photography:
- Reduction of distracting visual artifacts enhances overall aesthetics.
- Improved clarity allows viewers to appreciate intricate details within the trails.
- Enhanced image quality can increase the impact and professionalism of your work.
- Minimizing noise ensures a more immersive viewing experience, allowing viewers to focus on the beauty of the star trails themselves.
Incorporating table (markdown format):
| Technique | Pros | Cons |
|---|---|---|
| Shooting at low temperatures | Reduces digital noise | Requires specific weather conditions |
| Dark frame subtraction | Effective noise elimination | Additional time for capturing dark frames |
| Stacking multiple frames | Reduced individual frame noise | Increased post-processing complexity |
| Selective denoising | Preserves detail in non-noisy areas | Risk of overprocessing or loss of fine details |
By employing these techniques and understanding their respective advantages and limitations, photographers can elevate their star trail images to new heights while minimizing unwanted digital noise.
Transition into subsequent section about “Mastering long exposure photography”:
Now that we have explored effective strategies for reducing noise in our star trail shots, let’s delve into mastering long exposure photography techniques. By honing these skills, you’ll be able to capture stunning star trail images with confidence and precision.
Mastering long exposure photography
Imagine you are standing beneath a clear night sky, camera in hand, ready to capture the mesmerizing phenomenon of star trails. You have mastered noise reduction techniques and long exposure photography, but there is one crucial aspect that can make or break your shot – focusing. Achieving sharp focus on stars can be challenging due to their distance and lack of contrast. In this section, we will explore different focusing methods that will help ensure your star trail images are crisp and captivating.
One effective method for achieving precise focus is using manual focus with live view. By zooming in on a bright star or planet within the frame using the camera’s LCD screen, you can manually adjust the focus until the light source appears as small and defined as possible. This approach allows you to fine-tune the focus based on what you see directly on the display.
Another technique involves utilizing autofocus with infinity adjustment. Some lenses have an infinity symbol (∞) marked on their focus ring, indicating where true infinity lies. However, it’s important to note that this mark may not always align perfectly with optimal infinity focus for astrophotography. To compensate for any discrepancies, consider setting your lens slightly before or after the infinity marker while testing and reviewing your images for clarity.
When experimenting with different focusing methods, keep these tips in mind:
- Use a sturdy tripod to minimize vibrations during adjustments.
- Consider using a remote shutter release or self-timer function to further reduce shake caused by pressing the shutter button.
- Take test shots at various focal distances and review them carefully to determine which method provides the sharpest results.
- Remember that practice makes perfect; don’t be discouraged if achieving pinpoint star focus takes time and patience.
To further illustrate the importance of accurate focusing techniques, let’s take a look at a comparison table showcasing how different approaches yield varying levels of image sharpness:
| Focusing Method | Image Sharpness |
|---|---|
| Manual focus with live view | High |
| Autofocus with infinity adjustment | Moderate |
| Autofocus without manual fine-tuning | Low |
As we can see, manual focus utilizing live view offers the highest level of image sharpness, while relying solely on autofocus may result in decreased clarity. By adopting the most suitable focusing method for your star trail photography, you can capture stunning images that truly showcase the beauty of this celestial phenomenon.
Transitioning into our next section about exploring different focusing methods, let’s delve deeper into how you can enhance your night photography skills by experimenting with various Camera settings and techniques to perfect your star trail compositions.
Exploring different focusing methods
Having learned the art of mastering long exposure photography, we can now delve into exploring different focusing methods. One popular technique is manual focus, which allows for precise control over what elements in your frame are sharp and in focus. By understanding this method and its various advantages, you will be able to capture even sharper images of star trails.
Focusing manually might seem intimidating at first, but with practice, it becomes an essential skill for night photographers seeking optimal results. Let us consider a hypothetical example to illustrate the benefits of using manual focus. Imagine you want to photograph a stunning display of star trails against a breathtaking landscape. Using autofocus may struggle to lock onto distant stars due to their low light intensity or lack of contrast. However, by switching to manual focus and carefully adjusting your lens’ focal ring, you can ensure every detail in the night sky is crisp and clear.
To better comprehend the advantages offered by manual focus when capturing star trails, let’s explore some key points:
- Precise control: Manual focus enables precise adjustment based on your artistic vision.
- Consistency: Once you set the desired focus point manually, it remains fixed until you decide otherwise.
- Overcoming autofocus limitations: Autofocus systems often struggle in low-light situations or when faced with subjects lacking contrast.
- Creative possibilities: Manual focus opens up creative opportunities like intentionally defocused foregrounds or emphasizing specific elements within the composition.
Consider the following table that highlights how manual focus compares with other focusing techniques:
| Focusing Method | Advantages | Limitations |
|---|---|---|
| Manual Focus | Precise control | Requires experience |
| Autofocus | Quick and convenient | May struggle in low-light or low-contrast situations |
| Zone Focus | Allows for quick focusing at fixed distances | Limits flexibility when subject distance changes |
In conclusion, mastering the skill of manual focus is invaluable when capturing star trails. It provides you with precise control over your composition, allowing for sharper images that reveal intricate details of the night sky. In our next section on “Using manual focus for sharper images,” we will explore various techniques to enhance this process further.
Transition into subsequent section:
Now let’s delve into using manual focus for even crisper and more detailed star trail photographs.
Using manual focus for sharper images
When it comes to capturing sharp and detailed star trail images, using manual focus can greatly enhance the quality of your photographs. By taking control over the focusing process, photographers are able to achieve precise focus on the stars, resulting in clearer and more captivating images. Let’s explore how you can use manual focus effectively.
To illustrate the benefits of manual focus, consider this scenario: imagine you’re photographing a stunning night sky filled with countless stars. If you rely solely on autofocus, there is a chance that your camera may struggle to lock onto a specific point due to low light or lack of contrast. However, by switching to manual focus, you have full control over selecting an area of the frame where the stars appear sharpest, ensuring optimal image quality.
Here are some key steps to follow when using manual focus for sharper star trail images:
- Begin by setting your lens to infinity (∞) or its farthest focusing distance.
- Use Live View mode on your camera’s LCD screen to zoom in on a bright star or object within the scene.
- Slowly adjust the focus ring until the star appears as small and sharp as possible.
- Take test shots at various focal distances and review them on your camera’s display to fine-tune the focus if needed.
By employing these techniques during night photography sessions, photographers can capture intricate details in their star trail images. To further emphasize the impact of manual focus, let us take a closer look at its advantages through the following table:
| Advantages of Manual Focus | |
|---|---|
| Precise adjustment for optimum sharpness | Increased clarity and definition |
| Greater control over creative composition | Enhanced visual appeal |
| Improved depth perception | Captivating portrayal of movement |
As shown above, utilizing manual focus presents several advantages that contribute to producing compelling star trail photographs. By taking charge of the focusing process, photographers can achieve sharper and more visually appealing images.
Transitioning into the subsequent section about experimenting with composition techniques, it is important to remember that capturing mesmerizing star trails extends beyond just achieving sharpness. Let’s explore how various composition techniques can elevate your night photography skills even further.
Experimenting with composition techniques
As you continue your journey into capturing mesmerizing star trails in night photography, it is important to explore different composition techniques that can enhance the visual impact of your images. By experimenting with various approaches, you can create unique and captivating photographs that truly stand out.
To illustrate the effectiveness of composition techniques, let’s consider a hypothetical scenario where a photographer aims to capture star trails over an iconic mountain range. The photographer decides to employ three specific methods:
- Framing: The photographer carefully frames the shot so that the mountain range occupies a significant portion of the image, emphasizing its grandeur and creating a sense of scale against the vastness of the night sky.
- Rule of Thirds: Applying the rule of thirds, the photographer positions the mountain range along one-third of the frame while keeping two-thirds dedicated to showcasing the striking star trails overhead. This technique adds balance and interest to the composition.
- Leading Lines: To draw viewers’ attention towards both the stars and mountains, leading lines are incorporated into this photograph by including a winding river in front of the mountainside. These lines guide our gaze from foreground to background, creating depth and inviting exploration within the image.
By employing these composition techniques effectively, our hypothetical photographer successfully captures an awe-inspiring image wherein majestic star trails gracefully dance above an iconic mountain range.
To further understand how these techniques can be utilized in various scenarios, it is helpful to examine some additional examples:
| Composition Technique | Example |
|---|---|
| Symmetry | A perfectly reflected lake mirrors a dazzling starry sky |
| Silhouettes | Tree silhouettes provide contrast against radiant starlight |
| Contrasting Elements | Urban cityscape juxtaposed with twinkling celestial display |
| Minimalist Approach | Sparse landscape accentuates ethereal beauty overhead |
Through deliberate experimentation with diverse compositions like those mentioned above, photographers can elicit emotional responses from viewers and create visually compelling star trail images. By thoughtfully utilizing framing, the rule of thirds, leading lines, and other techniques, you have the power to transform a simple night sky into an evocative work of art.
Transitioning seamlessly into the subsequent section about including interesting foreground elements, let us explore how such elements can add depth and intrigue to your star trail compositions.
Including interesting foreground elements
With the right combination of composition techniques, capturing star trails in your night photography can produce truly mesmerizing results. In addition to experimenting with various compositions, it is crucial to consider including interesting foreground elements that complement the celestial display above.
To illustrate this point, let’s imagine a scenario where you are photographing star trails over a serene lake surrounded by towering trees. By incorporating an old wooden dock into the foreground of your composition, you create a captivating juxtaposition between nature and human-made structures. This not only adds depth and visual interest but also evokes a sense of nostalgia and tranquility for viewers.
Including compelling foreground elements allows for creative storytelling within your photographs. Here are some key reasons why integrating such elements can enhance the overall impact of your star trail images:
- Context: Foreground objects provide context and help establish a narrative within the frame.
- Scale and Perspective: These elements add scale and perspective, emphasizing the enormity of the vast night sky against earthly subjects.
- Visual Interest: Incorporating visually striking objects or patterns in the foreground creates dynamic contrast against the smooth arcs traced by star trails.
- Emotional Connection: A well-chosen foreground element can evoke emotions or memories, creating a more powerful connection between viewers and your image.
Consider using these ideas as inspiration when planning your next star trail shoot. Remember that each scene presents its own unique opportunities for fascinating foreground choices. Whether it’s an abandoned building, a winding path through a field, or silhouetted mountains on the horizon – experiment to find what resonates most effectively with your desired message.
Incorporating intriguing foreground elements sets the stage for creating balanced and compelling compositions in your night photography journey. Let’s explore how intentional framing and careful consideration of different compositional rules can further elevate your images’ aesthetic appeal.
Creating balanced and compelling compositions
To truly enhance the visual impact and storytelling potential of your star trail photographs, it is essential to include compelling foreground elements. By incorporating intriguing objects or landscapes in the foreground, you create a sense of depth and context that engages viewers on multiple levels. Let’s explore some techniques for effectively including these captivating features.
Example:
Imagine capturing an awe-inspiring shot of star trails above a serene lake nestled amidst towering mountains. The stillness of the water reflecting the celestial spectacle adds a mesmerizing touch to the image, emphasizing the tranquility of the scene while contrasting with the dynamic movement overhead.
Incorporating Foreground Elements:
- Complementary Objects: Look for objects that complement or contrast with the night sky, such as trees, rocks, buildings, or even people. Experiment with different angles and perspectives to find compositions where these elements interact harmoniously.
- Leading Lines: Utilize natural or man-made leading lines like roads, paths, or fences to guide the viewer’s eye towards the star trails. This not only creates visual interest but also helps establish a clear focal point within your photograph.
- Silhouettes: Incorporate silhouetted figures against the backdrop of star trails to add a sense of mystery and intrigue. These darkened shapes can evoke emotions and narratives that captivate viewers’ imagination.
- Atmospheric Conditions: Take advantage of weather conditions such as foggy evenings or misty mornings to introduce an ethereal quality into your images. These atmospheric effects can lend an otherworldly ambiance to your composition.
Table – Emotional Response Inducing Factors:
| Emotion | Technique |
|---|---|
| Wonder | Including vast open spaces in the foreground |
| Serenity | Capturing calm bodies of water reflecting stars |
| Intrigue | Silhouetting figures against starry skies |
| Awe | Showcasing contrasting elements in the composition |
By thoughtfully including captivating foreground elements, you engage viewers emotionally and draw them deeper into your star trail photographs. The juxtaposition of celestial wonders with earthly features creates a compelling narrative that sparks curiosity and wonder.
With an understanding of how to incorporate interesting foreground elements, it is time to delve into the art of creating balanced and compelling compositions. This crucial aspect will further enhance the visual impact of your star trail images while ensuring they resonate with viewers on a profound level. Practicing patience and persistence is key as we explore these composition techniques.
Practicing patience and persistence
Section H2: Practicing patience and persistence
Building on the foundation of creating balanced and compelling compositions, mastering the art of capturing mesmerizing star trails in night photography requires practitioners to cultivate a strong sense of patience and persistence. This section will delve into the importance of these qualities and provide practical tips for developing them.
Case study example:
Imagine a photographer embarking on an expedition to capture breathtaking star trail images in a remote location with limited access to amenities. Despite facing unforeseen challenges such as inclement weather conditions, technical malfunctions, and long exposure times, this dedicated individual remains steadfastly committed to their vision. Through unwavering perseverance, they are rewarded with stunning photographs that showcase the ethereal beauty of celestial motion against a backdrop of darkness.
Practicing patience and persistence is crucial in achieving successful results when photographing star trails. Here are some key points to consider:
- Embrace uncertainty: Nighttime conditions can often be unpredictable, from sudden changes in cloud cover to unexpected natural phenomena like light pollution or atmospheric disturbances. Accepting these uncertainties allows photographers to adapt their plans accordingly while maintaining focus on capturing those elusive moments.
- Dedicate time for experimentation: Achieving mastery in any field demands practice and exploration. Similarly, experimenting with different techniques – adjusting exposure settings, trying various compositions, or using different lenses – enables photographers to discover innovative ways to enhance their images.
- Develop resilience: Overcoming setbacks is an integral part of any creative process. Whether it’s enduring harsh physical environments or dealing with equipment failures, cultivating resilience helps photographers stay motivated even during challenging situations.
| Patience | Persistence | Benefits |
|---|---|---|
| Cultivating calmness | Maintaining determination | Enhanced concentration |
| Adapting strategies | Learning from mistakes | Increased problem-solving |
| Flexibility | Consistency | Improved creativity |
| Mindfulness | Perseverance | Heightened sense of achievement |
Incorporating these values into one’s practice fosters personal growth and enhances the overall quality of star trail photography. By demonstrating patience and persistence, photographers develop resilience in overcoming obstacles while also refining their technical abilities.
Note: Achieving mastery takes time and effort; there are no shortcuts or guarantees of immediate success. However, by embracing uncertainty, dedicating time for experimentation, developing resilience, and maintaining a balance between patience and persistence, individuals can unlock the potential to capture truly breathtaking star trail images.
Comments are closed.