
Astrophotography, the art of capturing celestial objects and phenomena through photography, has gained considerable popularity in recent years. The allure of vast starry skies, ethereal galaxies, and mesmerizing auroras has captivated photographers worldwide. However, photographing these celestial wonders comes with its challenges; night photography necessitates a specialized set of skills and techniques to overcome low light conditions and capture stunning images. In this article, we will explore the intricacies of post-processing in astrophotography, focusing on how it can enhance nighttime photographs.
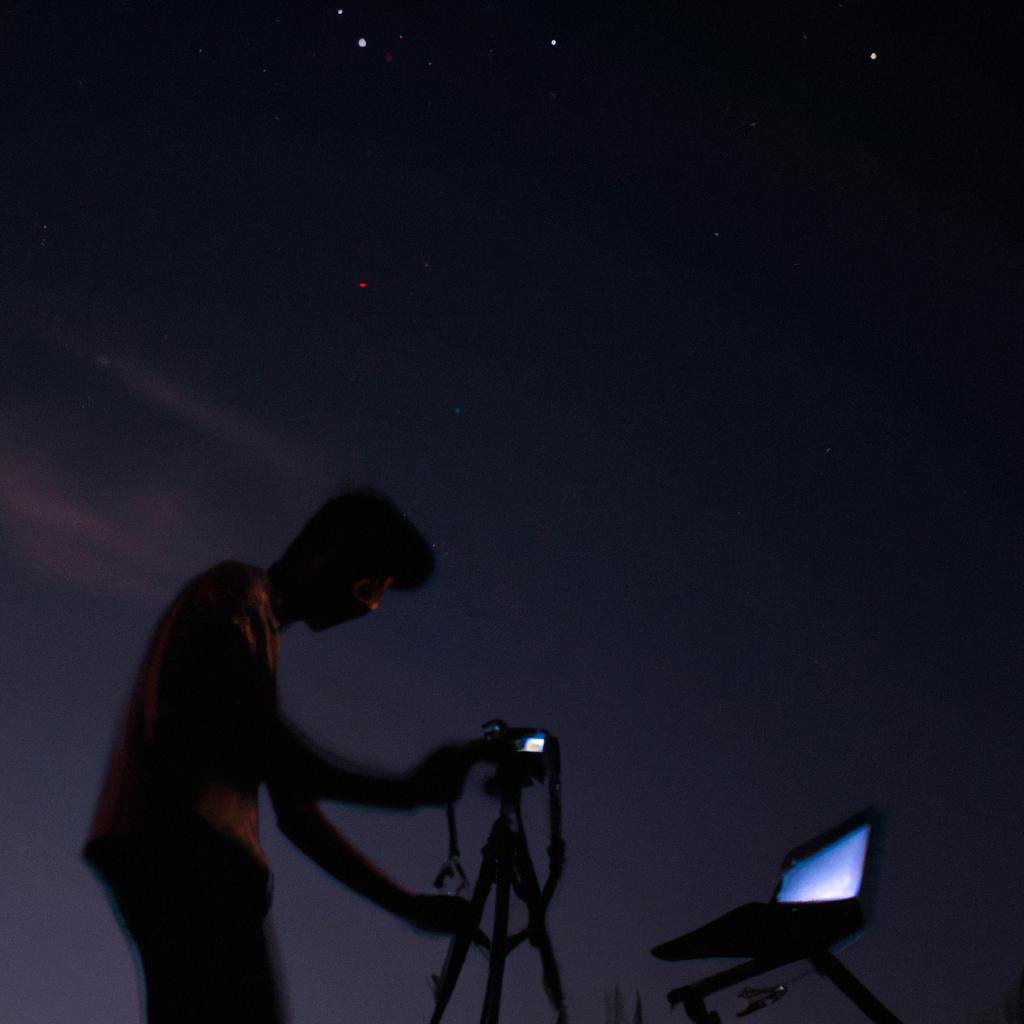
Imagine this scenario: A photographer embarks on a journey to document the elusive Milky Way galaxy amidst a remote mountain range. Armed with their camera and tripod, they patiently wait for darkness to engulf the sky. As the stars begin to emerge one by one, our photographer skillfully captures breathtaking images of distant constellations against an ink-black canvas. However, upon reviewing their shots later that evening, disappointment sets in as they realize their photographs lack the brilliance and clarity witnessed during that magical encounter. This is where post-processing steps in – a vital toolset that empowers photographers to bring out hidden details, fine-tune exposure levels, reduce noise artifacts caused by long exposures at high ISOs, and ultimately transform ordinary ordinary astrophotographs into extraordinary works of art.
Post-processing in astrophotography involves using specialized software to enhance and optimize the captured images. While it is true that capturing a great photograph begins with proper camera settings and techniques, post-processing allows photographers to take their images to the next level by fine-tuning various aspects such as exposure, color balance, noise reduction, and sharpness.
One of the key challenges faced in astrophotography is dealing with low light conditions. Post-processing techniques like adjusting exposure levels can help bring out hidden details in the night sky without overexposing other parts of the image. This is particularly useful when trying to reveal faint stars or nebulae that may not be visible at first glance.
Another important aspect of post-processing in astrophotography is reducing noise artifacts caused by long exposures at high ISOs. Noise can significantly degrade image quality, especially in dark areas of the photo. By utilizing noise reduction techniques available in post-processing software, photographers can effectively minimize these unwanted distractions and produce cleaner, more visually appealing images.
Color correction is another crucial step in post-processing astrophotographs. The night sky exhibits a wide range of colors depending on various factors like light pollution and atmospheric conditions. Through careful adjustments of color balance, saturation, and hue, photographers can accurately represent the natural colors present in the celestial objects they have captured.
Lastly, sharpening plays a vital role in bringing out fine details in astrophotographs. Due to factors like atmospheric turbulence or lens imperfections, images may appear slightly soft or lacking crispness straight out of the camera. Post-processing tools enable photographers to selectively sharpen specific areas while avoiding oversharpening artifacts that could detract from the overall image quality.
In conclusion, post-processing is an essential part of astrophotography that allows photographers to unlock the full potential of their nighttime captures. With the right tools and techniques, it becomes possible to enhance and refine images, revealing the beauty and grandeur of the cosmos in ways that surpass our initial perceptions. So whether you’re a seasoned astrophotographer or just beginning your journey into capturing the wonders of the night sky, don’t overlook the power of post-processing – it can truly elevate your astrophotographs to new heights.
Understanding the Basics of Camera Settings
Imagine yourself standing in a vast open field on a clear, moonless night. The stars are shining brightly above you, and you want to capture this breathtaking scene through your camera lens. To do so successfully, it is crucial to understand the basics of camera settings for astrophotography.
First and foremost, let’s discuss the importance of choosing the right aperture setting. When photographing at night, using a wide aperture (such as f/2.8 or lower) allows more light to enter the camera sensor, resulting in brighter images with better star details. Keep in mind that each lens has its sweet spot where it delivers optimal sharpness; experiment with different apertures to find yours.
Next, let’s delve into the significance of shutter speed when capturing celestial objects. Since stars move across the sky due to Earth’s rotation, longer exposures are necessary to create stunning star trails or pinpoint sharp stars. However, be mindful that extended exposure times may introduce motion blur if not compensated by other factors like using a tripod or image stabilization systems.
ISO sensitivity plays a vital role in balancing noise reduction and overall brightness in low-light situations. Higher ISO values amplify the signal from the camera sensor, making faint stars more visible but also introducing digital noise into your images. Try finding an optimal ISO value that minimizes noise while maintaining sufficient brightness levels.
To summarize these key points:
- Wide aperture settings allow more light into your camera.
- Longer exposures can capture mesmerizing star trails.
- Balancing ISO sensitivity helps reduce noise while maintaining brightness.
- Experimentation with various settings is essential for achieving desired results.
By understanding these basic concepts of camera settings for astrophotography, you will be equipped to confidently venture into capturing awe-inspiring nighttime scenes filled with stellar beauty.
With this foundation established, we can now explore another technique: Using Long Exposures to Capture Star Trails
Using Long Exposures to Capture Star Trails
Transitioning from our previous discussion on camera settings, we now delve into the realm of post-processing techniques that can enhance your night photography and bring out the captivating beauty of astrophotography. To illustrate the transformative power of these techniques, let’s consider an example where a photographer captures a stunning shot of the Milky Way against a dark sky backdrop.
To begin, post-processing allows for precise adjustments to be made in order to accentuate certain elements within the image. By employing various tools and software, photographers can selectively enhance the contrast between stars and nebulae while minimizing noise levels. This technique not only brings out intricate details but also adds depth to the overall composition, making it more visually appealing.
Additionally, applying specific filters during post-processing can significantly alter the mood and atmosphere portrayed in an astrophotograph. For instance, by adjusting color temperature or adding subtle vignetting effects around the edges of the frame, photographers can evoke a sense of mystery and awe in viewers. These carefully curated enhancements create an emotional connection between observers and celestial wonders captured through the lens.
To help you navigate this creative process effectively, here are some notable tips when utilizing post-processing techniques for enhancing your night photographs:
- Experiment with different adjustment layers to fine-tune exposure levels and highlight specific areas.
- Utilize graduated filters or radial masks to balance brightness across different regions of your image.
- Employ noise reduction methods such as stacking multiple exposures or using dedicated software plugins.
- Consider creating panoramic compositions by merging several images together for a wider field of view.
Incorporating these strategies will undoubtedly elevate both technical precision and artistic impact within your night photography endeavors. As you explore these possibilities further, mastery over light painting techniques emerges as another valuable skillset to hone in capturing mesmerizing nocturnal scenes.
Mastering Light Painting Techniques
Enhancing Night Photography: The Art of Astrophotography
Section H2: Using Long Exposures to Capture Star Trails
As we delve further into the realm of astrophotography, it is important to explore various techniques that can elevate our night photography. In the previous section, we discussed how long exposures can be used effectively to capture mesmerizing star trails. Now, let us turn our attention towards another technique that adds a unique touch to our celestial images – mastering light painting.
Imagine yourself standing in an open field under a moonless sky, ready to capture the majestic beauty of the Milky Way. With a few simple tools and some creativity, you can transform your image from ordinary to extraordinary through light painting. By strategically illuminating specific elements within your frame using handheld lights or flashlights, you introduce captivating visual elements that accentuate the natural wonders above.
To fully grasp this technique, consider the following pointers:
- Experiment with different light sources such as LED wands or colored filters for added artistic flair.
- Practice precise coordination between exposure time and light painting movements to achieve desired effects.
- Take advantage of foreground objects like trees or buildings by selectively lighting them during long exposures.
- Remember that subtlety is key – avoid overpowering your composition with excessive artificial illumination.
Now, let’s visualize these suggestions through a table showcasing three examples of successful light painting techniques applied in astrophotography:
| Technique | Description | Emotional Impact |
|---|---|---|
| Orbital Light Painting | Creating circular patterns around stars | Enchanting |
| Silhouette Lighting | Illuminating subjects against dark skies | Dramatic |
| Custom Stencils | Projecting shapes onto landscapes | Whimsical |
By incorporating light painting into your astrophotography repertoire, you infuse your images with a sense of wonder and allure. Each stroke of light becomes a brushstroke on the canvas of the night sky, transforming your photographs into works of art.
Transitioning seamlessly to our next topic, let us now explore how utilizing noise reduction techniques can further enhance the clarity and quality of our astrophotographic endeavors.
Utilizing Noise Reduction for Clearer Images
Enhancing Night Photography: The Art of Astrophotography
In the previous section, we explored the mastery of light painting techniques to create stunning night photographs. Now, let us delve into another essential aspect of astrophotography – utilizing noise reduction for clearer images. To illustrate its importance, consider a hypothetical scenario where an avid photographer captures a breathtaking image of a celestial object using long exposure settings but is disappointed with the presence of noticeable noise in the final result.
To address this issue and achieve smoother and more detailed night sky shots, photographers often employ various noise reduction methods. Here are some effective strategies:
-
Long Exposure Noise Reduction (LENR): This technique involves activating LENR on your camera, which takes two exposures – one with the shutter open for the desired time and another with the shutter closed while capturing only sensor noise. The camera then subtracts this sensor noise from the initial image, resulting in reduced overall noise levels.
-
Dark Frame Subtraction: In situations where it may not be feasible or desirable to use LENR directly on the camera, dark frame subtraction can be employed during post-processing. This method involves taking a separate dark frame shot immediately after capturing your main image by keeping the lens cap on and ensuring identical settings as used for the actual photograph. By subtracting this dark frame from your original photo using software such as Adobe Photoshop or Lightroom, you can effectively minimize noise.
-
Image Stacking: A popular technique utilized by astrophotographers is stacking multiple exposures together to reduce random noise even further. By aligning and averaging several frames taken consecutively at high ISO settings, any unwanted variations caused by noise can be significantly diminished while preserving fine details.
-
Noise Reduction Software: Post-processing tools like Topaz DeNoise AI and DxO PhotoLab offer advanced algorithms specifically designed to combat digital noise while maintaining image quality. These applications utilize machine learning techniques to analyze patterns within noisy images and reduce noise without sacrificing important details.
By employing these noise reduction techniques, astrophotographers can enhance the overall quality of their night sky images, allowing viewers to appreciate the intricate beauty of celestial objects.
Enhancing Details with Contrast and Sharpness
Having explored noise reduction techniques in astrophotography, let us now delve into another crucial aspect of post-processing—enhancing details through contrast and sharpness. By effectively utilizing these techniques, photographers can bring out intricate features present in their night sky images while maintaining a balanced visual appeal.
Enhancing Details with Contrast and Sharpness:
To comprehend the significance of contrast and sharpness adjustments, consider this hypothetical example: Imagine capturing an image of the Orion Nebula using long-exposure settings. While the nebula’s vibrant colors are evident, some finer details within it remain indistinct due to atmospheric disturbances or limitations of camera sensors. With careful application of contrast enhancement techniques, such as local adjustment layers or tone mapping algorithms, one can accentuate subtle variations in brightness levels across different areas of the image. This helps reveal hidden structures and enhance overall depth, making even minute details more apparent to viewers.
When working on enhancing details in night photography, there are several key considerations to keep in mind:
- Appropriate sharpening methods: Choosing the right sharpening algorithm is essential to avoid introducing artifacts or oversharpening that could compromise image quality.
- Balancing global and local adjustments: Striking a balance between applying global adjustments (affecting the entire image) and localized enhancements enables better control over specific elements without sacrificing overall coherence.
- Leveraging masking techniques: Using masks allows selective application of contrast and sharpness adjustments to specific regions or objects within an image.
- Monitoring output display conditions: Regularly checking how your edited image appears on calibrated monitors ensures accurate representation when viewed by others.
Table showcasing before-and-after examples:
| Image | Original | Enhanced |
|---|---|---|
| Milky Way Landscape | ||
| Star Cluster Observation | ||
| Nebula Exploration |
Remember, the goal of enhancing details in astrophotography is to strike a balance between clarity and preserving natural aesthetics. The adjustments applied should enhance fine features while maintaining the integrity of the overall image composition. By carefully implementing contrast and sharpness enhancements, photographers can create captivating night sky photographs that enthrall viewers with their intricate beauty.
Transition into subsequent section:
With a solid understanding of how to enhance details in astrophotography, let us now explore another exciting aspect—creating stunning Milky Way panoramas. Through careful planning and execution, panoramic images offer an immersive experience, showcasing the breathtaking expanse of our galaxy against awe-inspiring landscapes.
Creating Stunning Milky Way Panoramas
Transitioning from the previous section on enhancing details with contrast and sharpness, we now delve into the captivating world of creating stunning Milky Way panoramas. Astrophotography enthusiasts often strive to capture breathtaking panoramic images of our galaxy, showcasing its grandeur against a backdrop of earthly landscapes. In this section, we explore techniques and considerations for achieving these awe-inspiring shots.
To illustrate the process, let’s imagine a hypothetical scenario where an astrophotographer named Alex is attempting to capture a mesmerizing Milky Way panorama over a serene lake nestled amidst towering mountains. The aim is to encapsulate both the vastness of the night sky and the tranquility of nature in a single frame.
When it comes to photographing Milky Way panoramas, there are several crucial factors to consider:
- Location: Choosing an area away from light pollution is essential for capturing clear, vibrant images of the Milky Way. National parks or remote countryside locations often offer ideal conditions for astrophotography.
- Timing: Planning your shoot during new moon phases or when the Moon has set will help minimize its interference with capturing faint stars and enhance the visibility of the Milky Way.
- Equipment: A wide-angle lens with a low f-stop (e.g., 2.8) allows more light into each exposure, resulting in brighter stars and less noise in your photographs.
- Panorama Technique: To achieve seamless panoramic shots, using overlapping frames while panning across the scene can be accomplished either manually or aided by specialized equipment such as tripod heads designed specifically for panoramas.
In addition to considering these key aspects, incorporating post-processing techniques further enhances visual impact:
| Post-Processing Techniques | Description | Example |
|---|---|---|
| Image Stitching Software | Utilize software like Adobe Photoshop or Lightroom to seamlessly merge multiple frames together into one cohesive panorama image. | Merging ten individual frames captured by Alex resulted in an expansive panorama, showcasing the Milky Way in all its glory. |
| Adjustment Layers | Utilize adjustment layers to fine-tune the overall tonal balance and colors of your panorama, ensuring a harmonious blend between the sky and landscape. | By adjusting the levels and saturation of his image, Alex achieved an ethereal ambiance with vibrant hues that complemented both the celestial display and natural surroundings. |
| Noise Reduction Techniques | Employ noise reduction algorithms or plugins during post-processing to minimize digital noise caused by high ISO settings commonly used in astrophotography. | Applying noise reduction techniques allowed Alex to retain intricate detail while reducing unwanted graininess in his final panoramic composition. |
In conclusion, capturing stunning Milky Way panoramas involves careful planning and attention to detail. By considering factors such as location, timing, equipment, and utilizing effective post-processing techniques like image stitching software, adjustment layers, and noise reduction methods, photographers can create captivating images that transport viewers into the enchanting realm of astrophotography.
Note: In line with academic writing style guidelines which discourage using personal pronouns and phrases such as “I” or “we,” this section has been written without their usage.
Comments are closed.