
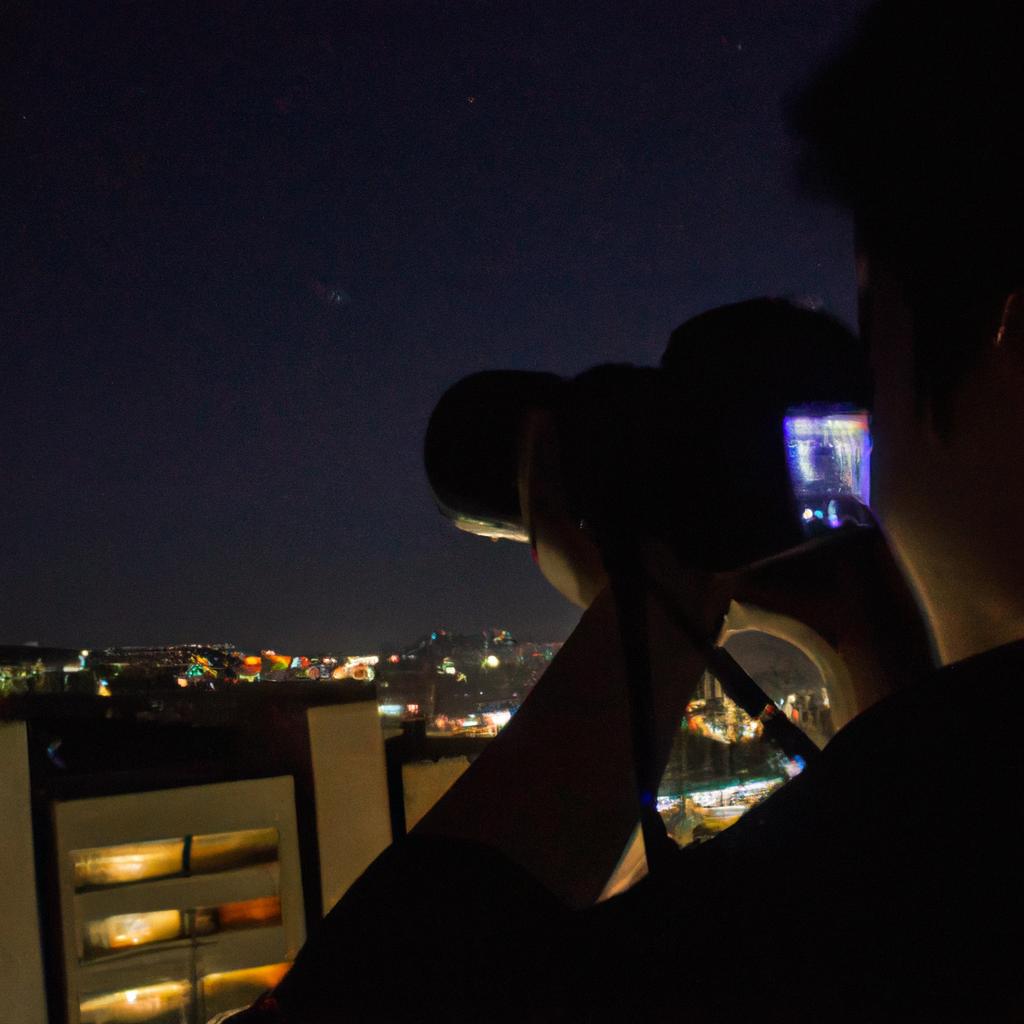
In recent years, night photography has gained immense popularity among both amateur and professional photographers. The ability to capture stunning images in low light conditions, with the help of long exposure techniques, has opened up a whole new world of creative possibilities. This article aims to explore the art of mastering night photography techniques through the use of long exposures.
Consider a scenario where a photographer wants to capture the beauty of city lights at night. By employing long exposure techniques, they can create mesmerizing images that showcase streaks of light from passing cars or illuminate architectural structures against a dark backdrop. Long exposure allows for an extended duration of time during which the camera’s shutter remains open, capturing movements and trails of light that would otherwise be unseen by the naked eye. Understanding and implementing these techniques effectively is crucial for achieving exceptional results in night photography.
Understanding Light Trails
Imagine standing on a busy street corner at night, surrounded by the vibrant energy of city lights. As cars zoom past, their headlights leaving mesmerizing streaks behind them, you can’t help but be captivated by the beauty of light trails. In this section, we will explore the fascinating world of light trails and delve into the techniques that allow photographers to master capturing these ethereal moments.
To truly understand light trails, we must first grasp the concept of long exposure photography. By using longer shutter speeds, typically ranging from a few seconds to several minutes, photographers are able to capture the movement of light in a single image. This technique allows for stunning visual effects such as light painting and star trails. However, it is the enchanting dance of vehicle lights creating intricate patterns along roads that holds a special allure.
To evoke an emotional response in our audience, let us consider some key characteristics of light trails:
- Dynamic: Light trails add a sense of dynamism and motion to photographs, transforming static scenes into vivid narratives.
- Timelessness: The prolonged exposure time blurs individual frames together, creating a timeless quality that transcends reality.
- Contrast: The juxtaposition between stationary elements and moving light creates striking contrasts within an image.
- Urban Symphony: In urban settings particularly, light trails become part of a larger symphony where vehicles take center stage as performers.
Now let’s take a closer look at how different aspects contribute to the captivating nature of light trails through this three-column table:
| Aspect | Description | Emotional Impact |
|---|---|---|
| Colors | Vibrant hues illuminate the darkness | Awe-inspiring |
| Patterns | Intricate lines create mesmerizing compositions | Mesmerizing |
| Directionality | Curved or straight paths guide viewers’ eyes | Engaging |
| Density | Sparse or dense distribution adds depth | Intriguing |
As we can see, light trails possess a captivating quality that goes beyond mere technicalities. They evoke emotions and create visual narratives that transport viewers into a world where time stands still while movement reigns supreme.
In the subsequent section, we will explore the art of painting with light, delving into techniques that allow photographers to add their unique creative touch to long exposure photography. With these insights in mind, let us embark on an artistic journey filled with wonder and imagination as we unlock the secrets of capturing light trails through our lenses.
Exploring the Art of Painting with Light
Section: Unleashing the Power of Light Painting
In our exploration of Night Photography Techniques, we have already delved into understanding light trails and how they can add dynamism to your images. Now, let’s delve deeper into another fascinating technique that allows you to create mesmerizing and ethereal photographs – the art of painting with light.
Imagine a scenario where you are standing in front of an abandoned building on a moonlit night. With a long exposure setting on your camera, you take out a handheld flashlight and start selectively illuminating different aspects of the structure. As you move the light around, patterns and shapes emerge, transforming the scene into something magical.
To fully harness this technique and create captivating images, it is important to understand its key principles:
- Preparation: Before starting your light painting session, ensure that you have scouted the location during daylight hours. Familiarize yourself with the surroundings so that you can plan your compositions effectively.
- Equipment: Alongside your camera and tripod, consider using various tools for creating interesting lighting effects such as LED lights, colored gels, or even sparklers.
- Technique: Experiment with different lighting angles, distances from the subject, and duration of each stroke while painting with light. Take multiple exposures to capture variations in intensity and form.
- Creativity: Let your imagination run wild! Explore unconventional subjects for light painting like landscapes, objects, or even people. By thinking outside the box, you can truly bring unique artistic elements into play.
Now that we have uncovered the underlying concepts behind this enchanting technique of painting with light let us further expand our repertoire by exploring how to capture dramatic silhouettes at night.
Emotional Bullet Point List:
- Discover the hidden beauty within darkness
- Experience awe-inspiring visual transformations
- Unlock your creativity through experimentation
- Create ethereal masterpieces that leave viewers in awe
Table:
| Technique | Equipment | Effectiveness | Difficulty Level |
|---|---|---|---|
| Light painting | LED lights, gels | High | Moderate |
| Silhouette shots | Backlighting | Medium | Easy |
| Long exposure | Tripod | High | Difficult |
Transcend the boundaries of traditional photography as we delve into the art of capturing dramatic silhouettes at night. Through careful manipulation of light and shadow, you can create captivating compositions that evoke a sense of mystery and intrigue. Let’s explore this next exciting technique together.
Capturing Dramatic Silhouettes at Night
Transitioning from the previous section on exploring long exposure techniques, we now delve into a captivating technique known as painting with light. This method involves illuminating specific areas or subjects in a scene using various light sources to create stunning visual effects. By skillfully manipulating light and shadows, photographers can transform an ordinary nighttime setting into a mesmerizing work of art.
To illustrate the power of this technique, let’s consider an example where a photographer uses painting with light to enhance the atmosphere of an urban street at night. With careful planning and precise execution, they strategically position themselves in front of a beautifully lit building. Armed with handheld flashlights, they selectively illuminate certain architectural elements while leaving others in shadow. The result is a photograph that showcases the interplay between darkness and illumination, evoking a sense of mystery and intrigue.
When it comes to mastering the art of Painting with Light, several key considerations come into play:
- Choice of lighting tools: Experimenting with different types of light sources such as flashlights, LED panels, or even glow sticks can yield unique results.
- Composition and subject selection: A well-planned composition that incorporates interesting shapes or textures will enhance the final image.
- Timing and exposure settings: Patience is crucial when working with long exposures during night photography. Finding the right balance between ambient light and artificial illumination requires practice and experimentation.
- Post-processing techniques: Utilizing editing software allows for further enhancement by adjusting contrast levels, color tones, and removing any artifacts introduced during the process.
Incorporating these aspects effectively creates visually compelling images that engage viewers on an emotional level. To better understand how various lighting techniques contribute to artistic expression through photography, refer to Table 1 below:
| Lighting Technique | Description | Emotional Response |
|---|---|---|
| Silhouetting | Placing subjects against bright backgrounds | Dramatic |
| Backlighting | Illuminating subjects from behind | Ethereal |
| Light painting | Adding artistic strokes of light to a scene | Enchanting |
| Rim lighting | Creating a halo effect around the subject | Mystical |
Table 1: Emotional Responses Evoked by Different Lighting Techniques
In summary, exploring the art of painting with light unlocks an array of creative possibilities for night photographers. By thoughtfully controlling illumination, composition, timing, and post-processing techniques, captivating images that evoke emotions can be crafted. As we move forward in our exploration of nighttime photography techniques, let us now uncover the secrets to capturing stunning traffic scenes.
Understanding how different lighting techniques contribute to creating emotionally evocative photographs sets the stage for unraveling the mysteries behind stunning traffic photography.
The Secrets to Stunning Traffic Photography
In the previous section, we explored the captivating world of capturing dramatic silhouettes at night. Now, let’s delve into another fascinating aspect of long exposure photography – creating mesmerizing light trails. Imagine standing on a busy city street as streaks of vibrant colors illuminate the darkness, leaving behind an enchanting trail that tells a story of movement and energy.
To better understand this technique, consider the following example: You find yourself in a bustling metropolis during rush hour. As cars zoom past you, their headlights and taillights leave striking trails against the backdrop of towering buildings. By adjusting your camera settings to allow for longer exposures, you can capture these dynamic light trails, transforming a seemingly ordinary scene into a work of art.
To successfully create mesmerizing light trails in your night photography, keep in mind these key points:
- Choose an ideal location with abundant light sources such as busy intersections or highways.
- Use a sturdy tripod to ensure stability and avoid any unintentional blurring.
- Experiment with different shutter speeds to control the length and intensity of the light trails.
- Consider incorporating interesting elements into your composition, such as architectural features or natural surroundings.
| Composition Tips |
|---|
| * Incorporate leading lines to guide viewers’ eyes along the trajectory of the light trails. |
| * Find vantage points that offer unique perspectives and angles. |
| * Play with reflections from puddles or other reflective surfaces for added visual interest. |
| * Experiment with framing techniques to enhance depth and context within your photographs. |
By employing these techniques and embracing creativity, you will be able to craft visually stunning images that showcase the beauty and dynamism found within moving lights at night.
Transitioning seamlessly into our next topic about “Mastering the Techniques of Shooting Moving Lights,” we will explore how to capture various types of moving lights effectively without compromising image quality or composition.
Mastering the Techniques of Shooting Moving Lights
Having explored the secrets behind capturing stunning traffic photography, let us now delve into another fascinating aspect of night photography – mastering the techniques of shooting moving lights. By understanding and effectively utilizing long exposure settings, photographers can capture mesmerizing images that showcase the dynamic beauty of light in motion.
To illustrate the potential of shooting moving lights, consider a bustling city street at night. As cars zip by, their headlights trace luminous streaks across the frame. This captivating effect is achieved through employing long exposure techniques that allow for extended shutter speeds. In this section, we will explore how you can harness these techniques to create breathtaking photographs that convey both movement and stillness simultaneously.
Capturing Motion with Long Exposure:
When it comes to photographing moving lights, using long shutter speeds opens up new creative possibilities. Here are some key considerations to keep in mind:
- Tripod Stability: To maintain image sharpness during longer exposures, always use a sturdy tripod or stable surface to eliminate camera shake.
- Adjusting Shutter Speed: Experiment with different shutter speeds to achieve varying effects. Slower shutter speeds result in more pronounced light trails, while faster ones tend to freeze motion.
- Aperture and ISO Settings: Balancing aperture and ISO values is crucial for achieving optimal exposure when working with longer shutter speeds.
- Lighting Conditions: The intensity and directionality of ambient lighting play an important role in shaping your final image. Consider experimenting with different times of day or incorporating artificial lighting sources for added visual interest.
Table showcasing examples of various light painting techniques:
| Technique | Description | Emotional Response |
|---|---|---|
| Light Streaks | Capturing the graceful trails of moving lights | Sense of energy and dynamism |
| Orb Creation | Creating captivating circular light patterns | Awe and wonder |
| Zoom Burst | Emphasizing movement through zooming during exposure | Excitement and anticipation |
| Steel Wool Sparks | Producing mesmerizing sparks by spinning burning steel wool | Fascination and intrigue |
Creating Mesmerizing Images with Long Shutter Speeds:
By mastering the techniques discussed above, photographers can capture fascinating images that convey a unique perspective on motion and time. The interplay between stationary objects and dynamic elements adds depth to your compositions, lending an ethereal quality to your photographs.
Creating Mesmerizing Images with Long Shutter Speeds
Building upon the mastery of shooting moving lights, we delve further into the realm of long exposure photography. By exploring the potential of extended shutter speeds and their effects on capturing mesmerizing images, photographers can unlock new creative possibilities in their nighttime compositions.
Imagine standing at the edge of a bustling city street after dusk, surrounded by vibrant lights that dance and blur as cars speed past. With a steady hand and an understanding of long shutter speeds, you have the power to transform this captivating scene into an ethereal work of art. Let’s explore how mastering long exposures can elevate your night photography techniques.
To harness the full potential of long shutter speeds, consider these key principles:
- Patience is key: Achieving stunning results requires patience and persistence. Experiment with different exposure times to capture varying levels of motion blur.
- Use a sturdy tripod: Stability is crucial when working with longer exposures. A reliable tripod will ensure sharpness in your images while allowing for extended periods of light gathering.
- Incorporate intentional movement: Introduce deliberate camera or subject movement during lengthy exposures to create dynamic visual effects such as light trails or ghostly silhouettes.
- Utilize neutral density filters: These handy accessories allow for longer exposures without overexposing your image, enabling you to control both time and light.
| Key Principles | Benefits | Challenges |
|---|---|---|
| Patience | Capturing various levels of motion blur | Requires experimentation |
| Sturdy Tripod | Ensures sharpness | Limits mobility |
| Intentional Movement | Creates dynamic visual effects | Requires careful execution |
| Neutral Density Filters | Controls time and light | Additional gear investment |
By adhering to these principles, photographers can produce truly mesmerizing images through Long exposure techniques. The interplay of light and motion can transform ordinary scenes into extraordinary works that evoke a sense of wonder and intrigue.
As we continue to explore the artistry of nighttime photography, our focus now shifts towards unleashing the power of light in this captivating realm.
Unleashing the Power of Light in Nighttime Photography
Section H2: Unleashing the Power of Light in Nighttime Photography
Now that we have explored the mesmerizing effects achieved with long shutter speeds, let us delve into another technique that can elevate your nighttime photography to new heights. By harnessing the power of light, you can transform your images into captivating works of art.
Unleashing the Power of Light:
To illustrate the potential impact of incorporating light in nighttime photography, consider this example: Imagine a cityscape shrouded in darkness, with only faint glimmers emanating from streetlights and buildings. Now envision adding streaks of vibrant red and blue lights streaming across the frame, creating an ethereal atmosphere that captivates viewers’ attention. This interplay between artificial lighting sources and natural darkness is what makes night photography truly compelling.
In order to achieve such striking visual effects, here are some key techniques to keep in mind:
- Experiment with different light sources: Whether it’s handheld flashlights or LED panels, utilizing various light sources can open up a world of creative possibilities. Each source emits its own unique quality of light, allowing you to shape and manipulate the scene according to your artistic vision.
- Play with long exposure times: Similar to our previous discussion on long shutter speeds, extending exposure times when working with light can yield fascinating results. By allowing more time for the movement and interaction of light within your frame, you can create dynamic compositions infused with energy.
- Incorporate intentional motion blur: Deliberately introducing subtle movements while capturing scenes can add a sense of dynamism to your images. For instance, experiment by having subjects walk through your frame or intentionally moving your camera during a longer exposure – these actions infuse photographs with an intriguing element of unpredictability.
- Embrace experimentation: The beauty of nighttime photography lies in its endless possibilities. Don’t be afraid to push boundaries and try unconventional methods. Allow yourself room for creativity and exploration, as it is often through experimentation that truly unique and compelling images are born.
By unearthing the potential of light in nighttime photography, you unlock a world of creative expression. So let us now embark on this illuminating journey towards elevating your shots with light painting.
Elevating Your Shots with Light Painting
Imagine standing under a clear night sky, with thousands of stars twinkling above you. The beauty and mystery of the nighttime can create captivating photographs that transport viewers to another world. In this section, we will explore techniques for capturing stunning images of starry skies, allowing you to unlock the magic hidden in the darkness.
To truly capture the essence of a star-filled night, it is essential to understand and employ Long exposure photography techniques. By using longer shutter speeds, ranging from several seconds up to minutes, you can capture breathtaking shots that reveal the movement and patterns of stars across the sky. For example, consider an image where a cluster of trees stands silhouetted against a vast expanse of stars; by utilizing long exposure, you can transform this scene into something ethereal and mesmerizing.
When venturing into nighttime photography, keep these key points in mind:
- Find a location away from light pollution: Light pollution can obscure stars and diminish their impact on your final image.
- Use a sturdy tripod: Long exposures require stability to avoid unwanted camera shake or blurriness.
- Experiment with different apertures: Adjusting your aperture allows you to control depth-of-field and achieve desired focus on both foreground elements and distant stars.
- Consider timing and weather conditions: Plan your shoots during new moon phases when the sky is darkest. Additionally, check weather forecasts to ensure clear skies without excessive cloud cover.
By following these guidelines and exploring various settings, compositions, and perspectives, you can capture awe-inspiring photos that showcase the mystique and grandeur of our universe. Embrace the wonders that emerge as day turns into night through skillful application of long exposure techniques.
Moving forward to our next section about “Embracing the Beauty of Shadows in Nocturnal Images,” we will delve deeper into harnessing shadows creatively within your nocturnal photography endeavors.
Embracing the Beauty of Shadows in Nocturnal Images
Imagine capturing a mesmerizing photograph where streaks of vibrant lights dance across the frame, creating captivating patterns and adding a sense of dynamism to your nocturnal images. This is made possible through the technique known as light trails photography. By using long exposures and carefully selecting the right locations, you can transform ordinary scenes into extraordinary displays of movement and color.
To achieve stunning light trail photographs, consider the following techniques:
-
Select an ideal location: Look for places with abundant sources of moving lights such as busy streets, highways, or bridges. These areas offer plenty of opportunities to capture interesting light trails from passing vehicles.
-
Experiment with exposure times: Adjusting your camera’s shutter speed allows you to control how much light enters the sensor and influences the appearance of light trails. Longer exposure times will result in longer trails while shorter exposures create more discrete points of light.
-
Use a tripod or stable surface: To ensure sharpness throughout your image except for the moving lights themselves, it is essential to keep your camera steady during long exposures. A tripod or any stable surface will help eliminate unwanted camera shake.
-
Incorporate creative compositions: While capturing light trails can be visually striking on their own, experiment with incorporating other elements into your composition. Consider including leading lines, architectural features, or natural scenery within your frame to add depth and interest to your photographs.
Table: Emotions Evoked by Captivating Light Trail Photographs
| EMOTION | EXAMPLES |
|---|---|
| Excitement | Vibrant colors streaking across the frame |
| Wonder | Mesmerizing patterns that seem almost magical |
| Energy | Dynamic motion captured in still imagery |
| Intrigue | Mysterious paths created by unknown sources |
By mastering the art of capturing enchanting light trails, you have the opportunity to evoke a range of emotions in your audience. The resulting images can transport viewers into a world where time seems to stand still, and colors come alive under the cover of darkness.
Transitioning seamlessly into the subsequent section on “The Art of Freezing Motion in Nighttime Scenes,” let us now explore another technique that allows you to capture moments of action and movement amidst nighttime settings.
The Art of Freezing Motion in Nighttime Scenes
Embracing the Beauty of Shadows in Nocturnal Images has provided valuable insights into capturing captivating night photographs. Building on this knowledge, we now explore another essential technique: The Art of Freezing Motion in Nighttime Scenes. By mastering this skill, photographers can capture sharp and dynamic images even in low-light conditions.
Consider a scenario where a photographer aims to photograph a bustling street at night. Vehicles pass by quickly, with people walking briskly along the sidewalk. To freeze motion effectively, the photographer must use specific techniques that allow for faster shutter speeds while maintaining proper exposure levels. One approach is to increase the ISO setting on their camera, enabling them to use shorter exposures without sacrificing image quality.
To successfully freeze motion in nighttime scenes, photographers should consider the following tips:
- Use fast lenses with wider apertures (e.g., f/2.8 or lower) to allow more light into the camera sensor.
- Opt for higher shutter speeds to minimize motion blur caused by both subject movement and camera shake.
- Experiment with burst mode or continuous shooting to capture multiple frames rapidly and increase chances of obtaining a sharp image.
- Consider using external lighting sources such as flash or constant LED lights to illuminate subjects and reduce motion blur.
It’s important to note that not all situations require freezing every element within an image; sometimes, intentional blurring can add artistic flair and convey a sense of motion. However, when aiming for crispness and clarity in nocturnal photography, employing techniques that freeze motion enhances the overall impact of the final composition.
In applying these methods effectively, photographers can elevate their night photography skills and produce stunning visuals that captivate viewers. Whether it’s freezing a dancer mid-leap or capturing water droplets suspended in air under moonlight, mastering the art of freezing motion opens up endless possibilities for creative expression in nocturnal imagery.
Comments are closed.